Illuminating the Holidays: Crafting Personalized Christmas Ornaments with Clear Balls
Related Articles: Illuminating the Holidays: Crafting Personalized Christmas Ornaments with Clear Balls
Introduction
In this auspicious occasion, we are delighted to delve into the intriguing topic related to Illuminating the Holidays: Crafting Personalized Christmas Ornaments with Clear Balls. Let’s weave interesting information and offer fresh perspectives to the readers.
Table of Content
Illuminating the Holidays: Crafting Personalized Christmas Ornaments with Clear Balls

The Christmas season is a time for celebration, family, and cherished traditions. One enduring tradition is the adorning of Christmas trees with ornaments, each holding a unique story and reflecting the spirit of the season. While store-bought ornaments offer convenience, crafting personalized ornaments from clear glass balls provides a unique opportunity to infuse the festive spirit with personal touches, creating lasting memories and a sense of handcrafted warmth.
The Allure of Clear Glass Balls
Clear glass balls offer a blank canvas for creative expression. Their transparent nature allows for the inclusion of various decorative elements, showcasing intricate details and textures. This versatility makes them ideal for crafting personalized ornaments that embody individual styles and sentiments.
Crafting with Clear Glass Balls: A Step-by-Step Guide
Creating personalized ornaments with clear glass balls is a rewarding and enjoyable experience. The process involves a series of steps, each contributing to the final aesthetic and personal touch:
-
Gathering Supplies: The first step involves gathering the necessary supplies. These include:
- Clear glass balls: These are available in various sizes and can be sourced from craft stores, online retailers, or even repurposed from old ornaments.
- Decorative elements: This encompasses a wide range of materials, from glitter, sequins, and beads to dried flowers, miniature figurines, and even small family photographs.
- Adhesive: A strong, clear adhesive is crucial for securely attaching decorative elements to the inside of the glass ball.
- Ribbon or string: This is used for hanging the ornament.
- Optional tools: Depending on the chosen decorative elements, additional tools like tweezers, scissors, or a hot glue gun might be required.
-
Preparing the Glass Ball: Before decorating, the glass ball should be thoroughly cleaned to remove any dust or debris. This ensures a clear and pristine surface for applying decorations.
-
Adding Decorative Elements: This is the heart of the ornament-making process. Decorative elements can be strategically placed inside the glass ball, creating intricate patterns, layered textures, or thematic designs.
- For delicate elements: A small amount of adhesive can be applied to the inside of the glass ball, allowing the element to be carefully positioned and held in place.
- For heavier elements: A small amount of adhesive can be applied to the element itself, allowing it to adhere securely to the inside of the glass ball.
-
Adding Ribbon or String: Once the decorations are in place, a ribbon or string can be attached to the top of the glass ball using a strong adhesive or a small hook. This allows for easy hanging on the Christmas tree.
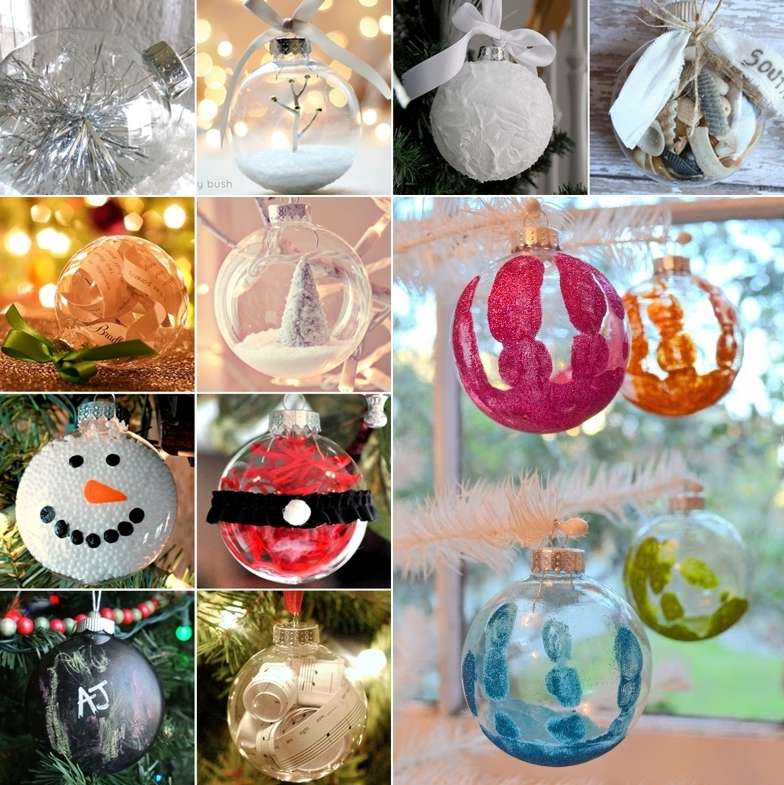
Exploring Diverse Decorative Themes
The beauty of crafting with clear glass balls lies in the endless possibilities for creating unique and personalized ornaments. Here are a few thematic ideas to inspire your creativity:
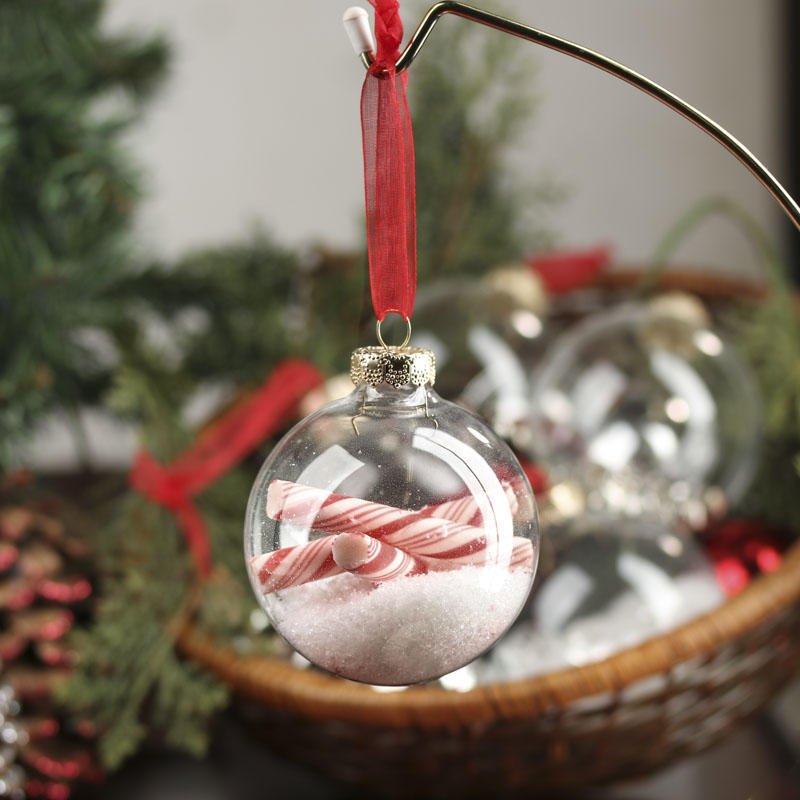
- Nature-inspired: Incorporate natural elements like dried leaves, pine cones, miniature branches, or even a single flower petal. These elements add a touch of rustic charm and connect the ornament to the natural world.
- Winter Wonderland: Embrace the winter spirit with snow-like glitter, miniature snowflakes, or even a small miniature snowman figurine. These elements create a whimsical and festive atmosphere.
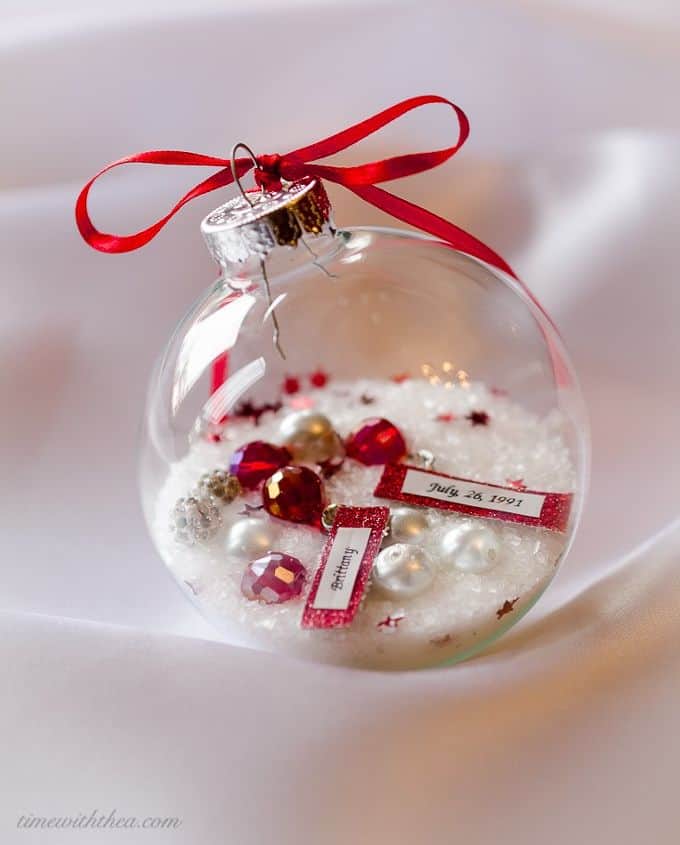
- Family Traditions: Preserve cherished family memories by incorporating small family photographs, miniature replicas of family heirlooms, or even a small inscription with a significant date or quote. These personal touches make the ornaments truly unique and sentimental.
- Holiday Festivities: Capture the essence of the holiday season with miniature ornaments, festive ribbons, or even a small miniature Santa Claus figurine. These elements add a touch of classic Christmas charm.
Tips for Crafting Perfect Ornaments
- Start with a plan: Before beginning the decorating process, it’s helpful to have a clear vision of the final design. This can involve sketching out ideas or gathering inspiration from images online.
- Use quality adhesive: A strong, clear adhesive is crucial for ensuring that the decorative elements remain securely attached inside the glass ball.
- Work in stages: To avoid overcrowding the ornament, it’s helpful to add decorative elements in stages. This allows for careful placement and prevents the ornament from becoming too cluttered.
- Experiment with textures and colors: Don’t be afraid to experiment with different textures and colors to create visually appealing and unique ornaments.
- Add a personal touch: Incorporate elements that reflect your personal style or family traditions. This will make the ornaments truly special and memorable.
FAQs about DIY Christmas Ornaments with Clear Balls
Q: What type of adhesive is best for attaching decorative elements to the inside of clear glass balls?
A: A strong, clear, and quick-drying adhesive is recommended. Epoxy glue, craft glue, or even hot glue can be used depending on the weight and type of decorative elements.
Q: How do I prevent air bubbles from forming inside the glass ball when adding adhesive?
A: Apply the adhesive in small amounts and spread it evenly. Allow the adhesive to dry completely before adding the next layer.
Q: Can I use paint to decorate the inside of the glass ball?
A: While it is possible, it’s important to use a special type of paint designed for glass. Regular paint may not adhere properly or could leave streaks on the glass.
Q: How can I ensure the ornaments remain durable and last for years to come?
A: Use high-quality materials, apply the adhesive properly, and handle the ornaments with care. Avoid exposing them to extreme temperatures or direct sunlight.
Conclusion: Embracing the Magic of Handmade Ornament
Crafting personalized Christmas ornaments with clear glass balls is a delightful and rewarding experience. It offers an opportunity to infuse the holiday spirit with personal touches, creating unique and cherished keepsakes. The process encourages creativity, fosters a sense of accomplishment, and allows for the creation of lasting memories. As these ornaments adorn Christmas trees year after year, they will serve as a reminder of the joy, warmth, and individuality that make the holiday season so special. By embracing the magic of handmade ornaments, we create a tangible expression of our love, creativity, and the spirit of the season.


Closure
Thus, we hope this article has provided valuable insights into Illuminating the Holidays: Crafting Personalized Christmas Ornaments with Clear Balls. We hope you find this article informative and beneficial. See you in our next article!