A Guide to Festive Flair: Achieving Christmas Tree Nail Art
Related Articles: A Guide to Festive Flair: Achieving Christmas Tree Nail Art
Introduction
With great pleasure, we will explore the intriguing topic related to A Guide to Festive Flair: Achieving Christmas Tree Nail Art. Let’s weave interesting information and offer fresh perspectives to the readers.
Table of Content
A Guide to Festive Flair: Achieving Christmas Tree Nail Art

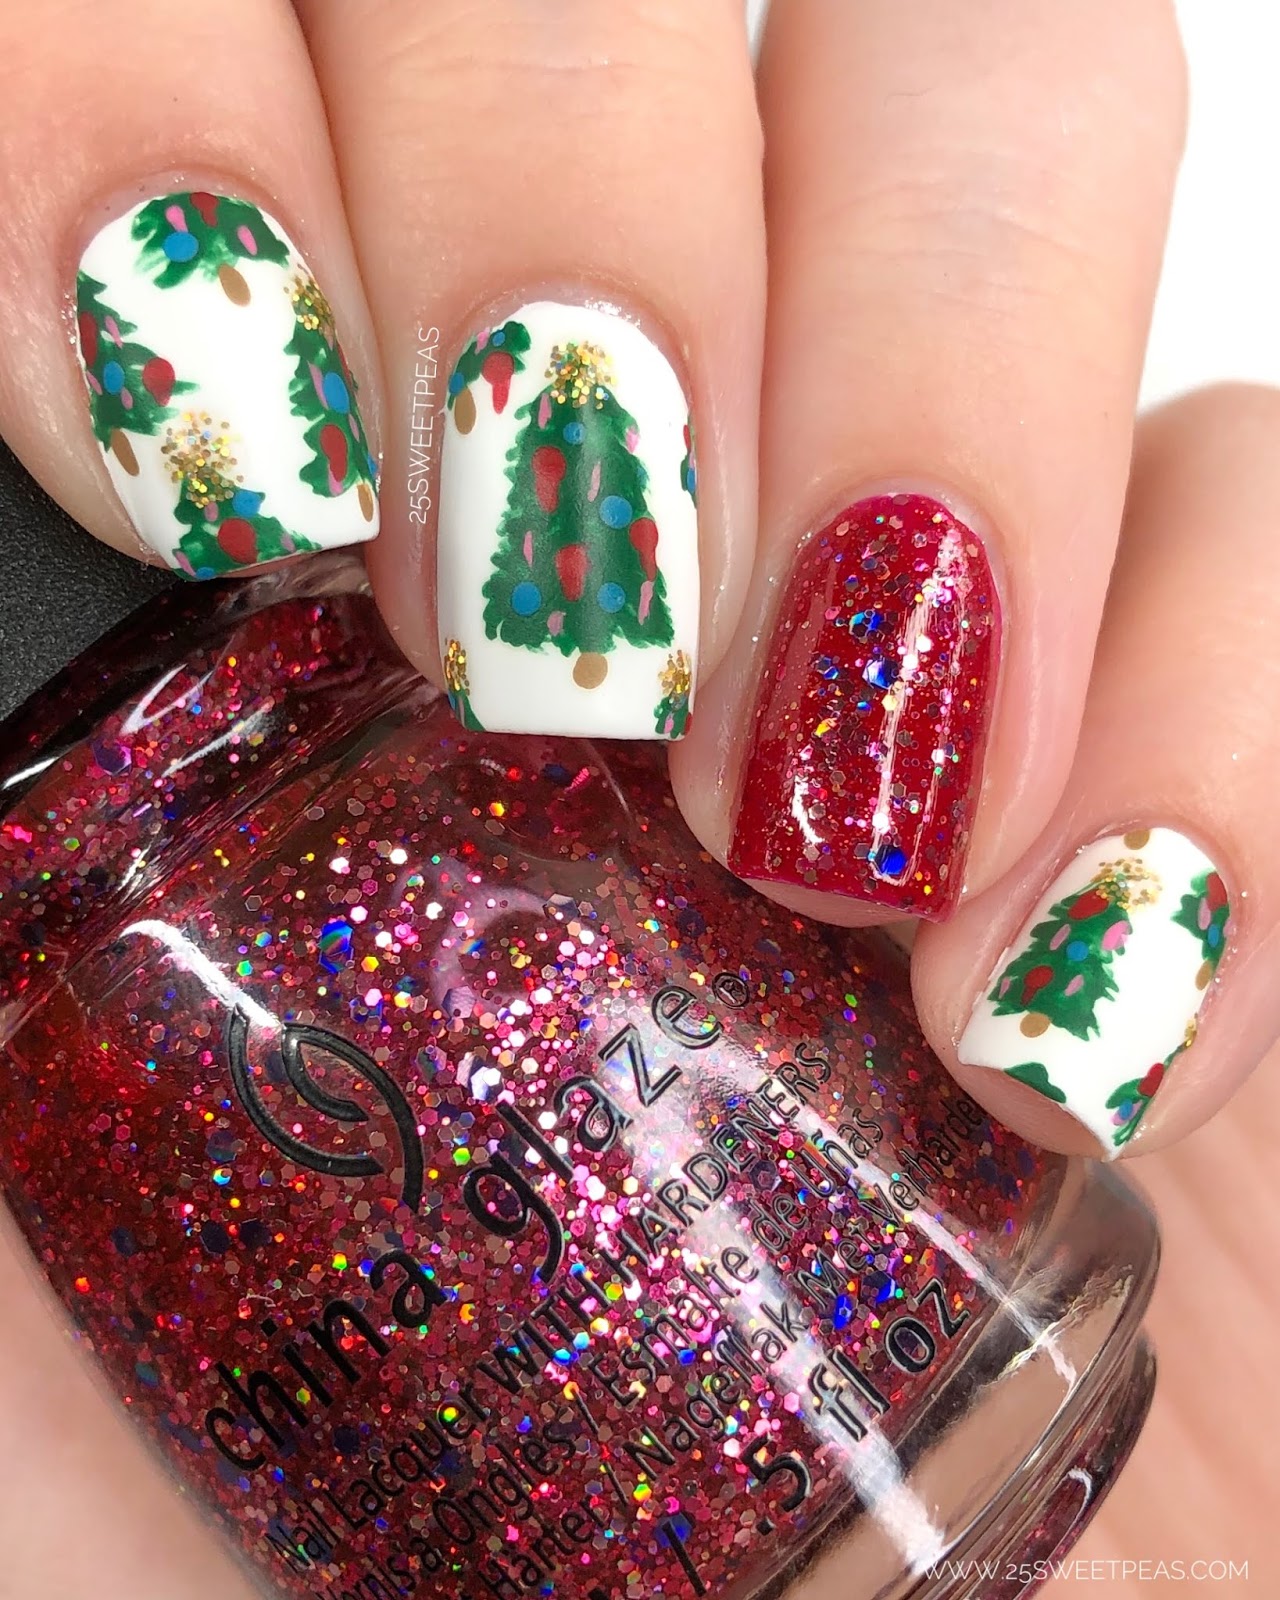
The holiday season evokes a sense of cheer and festivity, and what better way to embody this spirit than with a touch of Christmas-themed nail art? Christmas tree nail art, in particular, offers a delightful way to celebrate the season, allowing individuals to express their personal style and creativity. This guide delves into the techniques and considerations involved in creating this festive nail art, providing a comprehensive approach to achieving a polished and eye-catching look.
Understanding the Fundamentals: Essential Tools and Techniques
Before embarking on the journey of Christmas tree nail art, it is crucial to familiarize oneself with the fundamental tools and techniques that form the bedrock of this artistic endeavor.
1. Preparation is Key: Laying the Foundation
- Nail Preparation: Begin by preparing the nails for a smooth and long-lasting application. This involves shaping the nails to the desired length and filing them into a consistent shape. A cuticle pusher can be used to gently push back the cuticles, ensuring a clean canvas for the nail art.
- Base Coat Application: Applying a base coat is essential for protecting the natural nail from staining and creating a smooth surface for the subsequent layers of polish. Allow the base coat to dry completely before proceeding.
2. Choosing the Right Tools:
- Nail Polish: Select a range of nail polishes that complement the Christmas theme. This might include classic red, green, gold, or silver shades, or even more adventurous choices like glitter or shimmer finishes.
- Nail Art Brushes: Invest in a set of fine-tipped nail art brushes, which are crucial for precise detailing. A variety of brush sizes allows for versatility in creating different elements of the Christmas tree design.
- Dotting Tool: This versatile tool is essential for creating small dots, circles, and other intricate details. It comes in various sizes, allowing for the creation of different scale designs.
- Toothpick: A toothpick can also be used for creating dots and other small details, offering a cost-effective alternative to a dotting tool.
- Tape: Masking tape can be a valuable tool for creating clean lines and negative space designs, especially for creating the triangular shape of the Christmas tree.
- Nail Art Stickers: For a simpler approach, consider using pre-designed Christmas tree nail art stickers. These offer a convenient and time-saving option for achieving a festive look.
3. Mastering the Art of Nail Art:
- Freehand Techniques: For those comfortable with freehand drawing, this allows for greater creative freedom. Practice drawing simple Christmas tree shapes on paper before attempting them on the nails.
- Stamping Techniques: Nail art stamping involves using a stamping plate and a scraper to transfer designs onto the nails. This method offers a quick and efficient way to create intricate designs, including Christmas trees.
- Negative Space Techniques: This technique involves leaving portions of the nail bare, creating a contrasting effect. For a Christmas tree design, this could involve using tape to create a triangular shape and leaving the rest of the nail unpainted.
Crafting the Perfect Christmas Tree Nail Art: Step-by-Step Guide
Now, let’s delve into the practical steps involved in creating Christmas tree nail art. This guide provides a detailed process that can be adapted to suit individual preferences and skill levels.
1. The Base: Laying the Foundation
- Prepare the Nails: Follow the nail preparation steps outlined earlier, ensuring a clean and smooth surface for the nail art.
- Apply Base Coat: Apply a base coat to all nails and allow it to dry completely.
- Choose a Base Color: Select a base color for the Christmas tree design. This can be a neutral shade like white or a festive color like red or green. Apply two coats of the chosen base color, allowing each coat to dry fully.
2. Creating the Christmas Tree Shape:
- Freehand Technique: If using the freehand technique, carefully draw a Christmas tree shape onto each nail using a fine-tipped brush and a contrasting color to the base coat.
- Tape Technique: For a more precise approach, use masking tape to create a triangular shape on the nail. Apply the contrasting color to the exposed portion of the nail, then carefully remove the tape before the polish dries.
- Stamping Technique: Apply a thin layer of polish onto the desired Christmas tree design on a stamping plate. Use a scraper to remove excess polish. Press a stamping tool onto the plate to pick up the design, and then transfer it onto the nail.
3. Adding Festive Details:
- Ornaments: Use a dotting tool or toothpick to create small dots of different colors to represent ornaments on the Christmas tree. Experiment with different sizes and colors to create a visually appealing effect.
- Lights: Create a string of lights by using a fine-tipped brush to draw thin lines of a contrasting color from the base of the Christmas tree to the top.
- Star: Use a dotting tool or toothpick to create a star at the top of the Christmas tree.
- Glitter: Add a touch of sparkle by applying a thin layer of glitter polish to the Christmas tree or adding glitter dots.
4. Finishing Touches:
- Top Coat: Apply a top coat to seal the design and provide a glossy finish. This also helps to prevent chipping and smudging.
- Optional: Additional Details: Consider adding additional details to enhance the Christmas tree design. This could include adding a festive message, snowflakes, or other holiday-themed elements.
Beyond the Basics: Adding Personal Touches
While the above steps provide a foundational framework, the beauty of Christmas tree nail art lies in its versatility and room for personalization. Here are some ideas to add your unique touch:
- Color Combinations: Experiment with different color combinations to create unique and festive looks. Consider using shades of blue, purple, or pink for a more unconventional Christmas tree design.
- Texture: Incorporate textures into your design. Use glitter polishes, textured nail art powders, or even small pieces of holographic foil to add dimension and visual interest.
- Embellishments: Elevate your nail art with small embellishments such as rhinestones, tiny beads, or even miniature Christmas ornaments.
- Nail Art Stickers: Utilize pre-designed Christmas tree nail art stickers for a quick and easy way to add intricate details.
FAQs: Addressing Common Concerns
Q: What is the best way to remove Christmas tree nail art?
A: To remove the nail art, soak cotton balls in acetone-based nail polish remover and place them on each nail for a few minutes. The polish should start to soften, making it easier to remove with a cuticle pusher or a cotton swab.
Q: How long does Christmas tree nail art typically last?
A: With proper application and care, Christmas tree nail art can last for about a week or two. Applying a top coat regularly can help to extend its lifespan.
Q: Can I create Christmas tree nail art on short nails?
A: Absolutely! Christmas tree nail art can be adapted to suit any nail length. For short nails, consider scaling down the size of the tree and the details to ensure a balanced and proportionate design.
Q: What are some tips for achieving a professional-looking finish?
A: Here are some tips for achieving a polished and professional-looking Christmas tree nail art design:
- Use thin coats of polish: Applying thin coats of polish allows for better drying and prevents smudging.
- Allow each coat to dry completely: Patience is key. Ensure that each coat of polish is fully dry before applying the next layer.
- Clean up any mistakes: Use a cotton swab dipped in acetone to clean up any smudges or mistakes.
- Use a top coat: A top coat provides a protective layer, prevents chipping, and adds a glossy finish.
- Practice makes perfect: The more you practice, the more confident you will become in your nail art skills.
Conclusion: Embracing the Festive Spirit
Christmas tree nail art offers a delightful way to celebrate the holiday season, allowing individuals to express their creativity and festive spirit. By following this comprehensive guide, you can create stunning and eye-catching designs that embody the joy and warmth of the holidays. Whether you prefer a minimalist approach or a more intricate design, the possibilities are endless, and the only limit is your imagination. So, unleash your artistic flair and create festive nail art that will surely turn heads and spread holiday cheer.


Closure
Thus, we hope this article has provided valuable insights into A Guide to Festive Flair: Achieving Christmas Tree Nail Art. We hope you find this article informative and beneficial. See you in our next article!