A Guide to Easy Christmas Nail Art: Festive Designs for Every Skill Level
Related Articles: A Guide to Easy Christmas Nail Art: Festive Designs for Every Skill Level
Introduction
In this auspicious occasion, we are delighted to delve into the intriguing topic related to A Guide to Easy Christmas Nail Art: Festive Designs for Every Skill Level. Let’s weave interesting information and offer fresh perspectives to the readers.
Table of Content
A Guide to Easy Christmas Nail Art: Festive Designs for Every Skill Level
The holiday season is a time for celebration, joy, and of course, festive decorations. And what better way to embrace the Christmas spirit than with cheerful nail art? While intricate designs may seem daunting, there are countless easy and elegant options that can elevate your holiday look without requiring advanced nail art skills.
This article explores a range of simple yet impactful Christmas nail art ideas, providing step-by-step instructions and helpful tips for achieving a polished and festive finish. From classic snowflakes to whimsical reindeer, these designs are accessible to beginners and offer a fun and creative way to express your holiday cheer.
Classic Christmas Nail Art Designs:
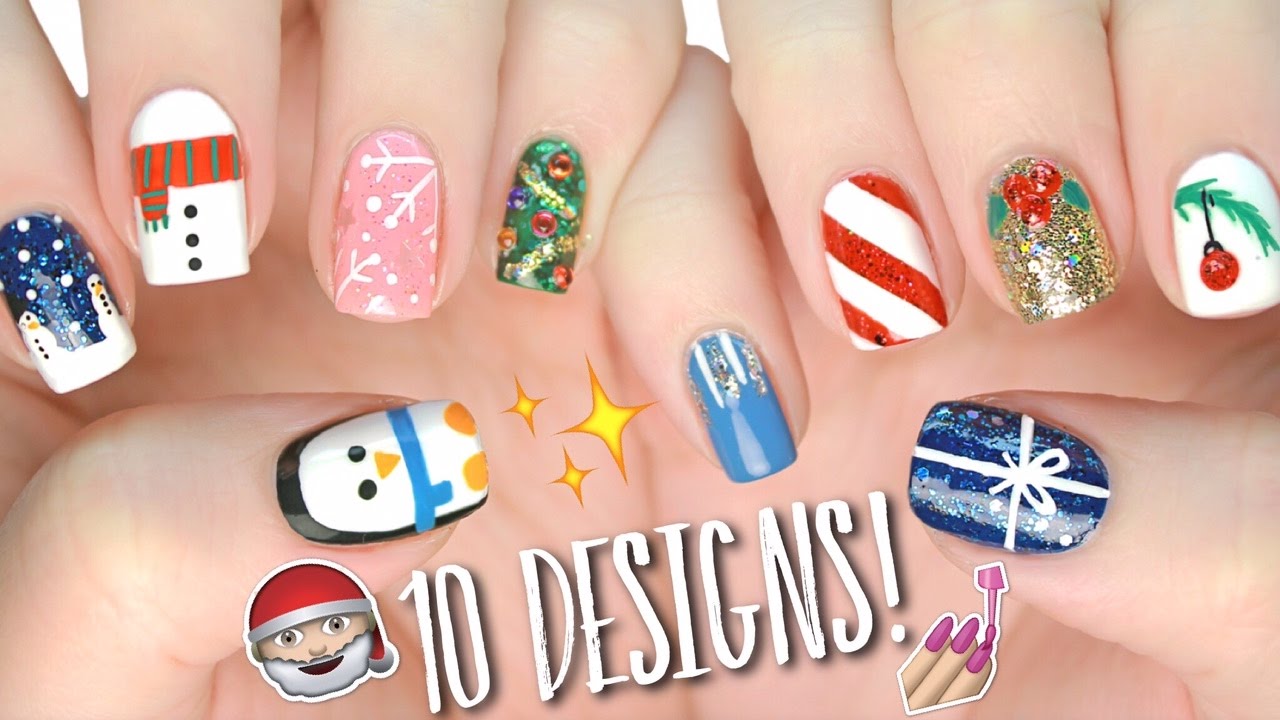
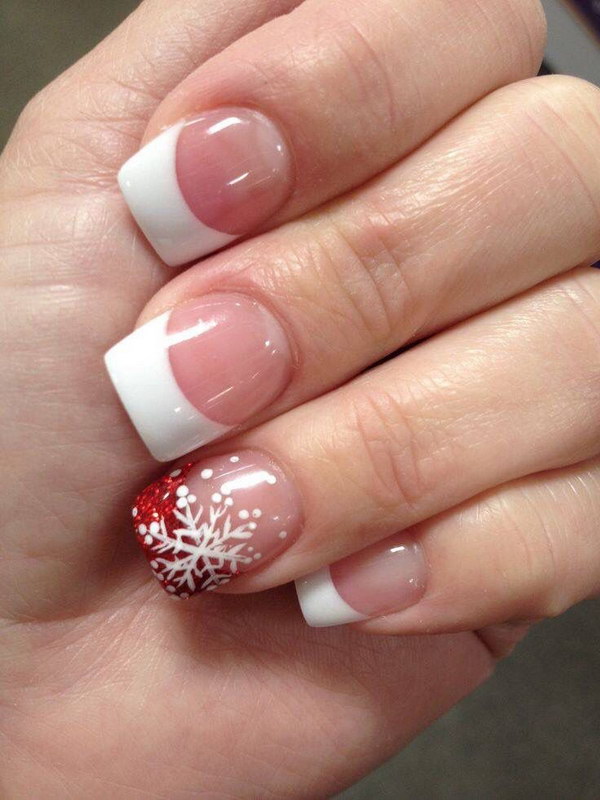
1. Snowflakes:
Snowflakes are a timeless Christmas symbol and are easily recreated on nails.
- Simple Snowflake: Using a thin nail art brush, draw a six-pointed star shape with white polish. Then, add delicate lines radiating from the center to create the snowflake’s intricate pattern.
- Negative Space Snowflake: Apply a base coat of your favorite color. Then, use a thin nail art brush dipped in white polish to outline a snowflake shape on a single nail. After the white polish dries, carefully remove the outline using a small piece of tape. The remaining negative space will create a subtle yet elegant snowflake design.
2. Christmas Trees:
Christmas trees are another classic motif that can be easily incorporated into your nail art.
- Minimalist Christmas Tree: Apply a base coat of green polish. Using a thin nail art brush and a contrasting color like white or gold, draw a simple triangle shape on one nail to represent the Christmas tree.
- Ornament-Adorned Tree: Paint a green Christmas tree on your nail. Then, use a dotting tool or a small brush to create tiny circles in various colors to represent ornaments.
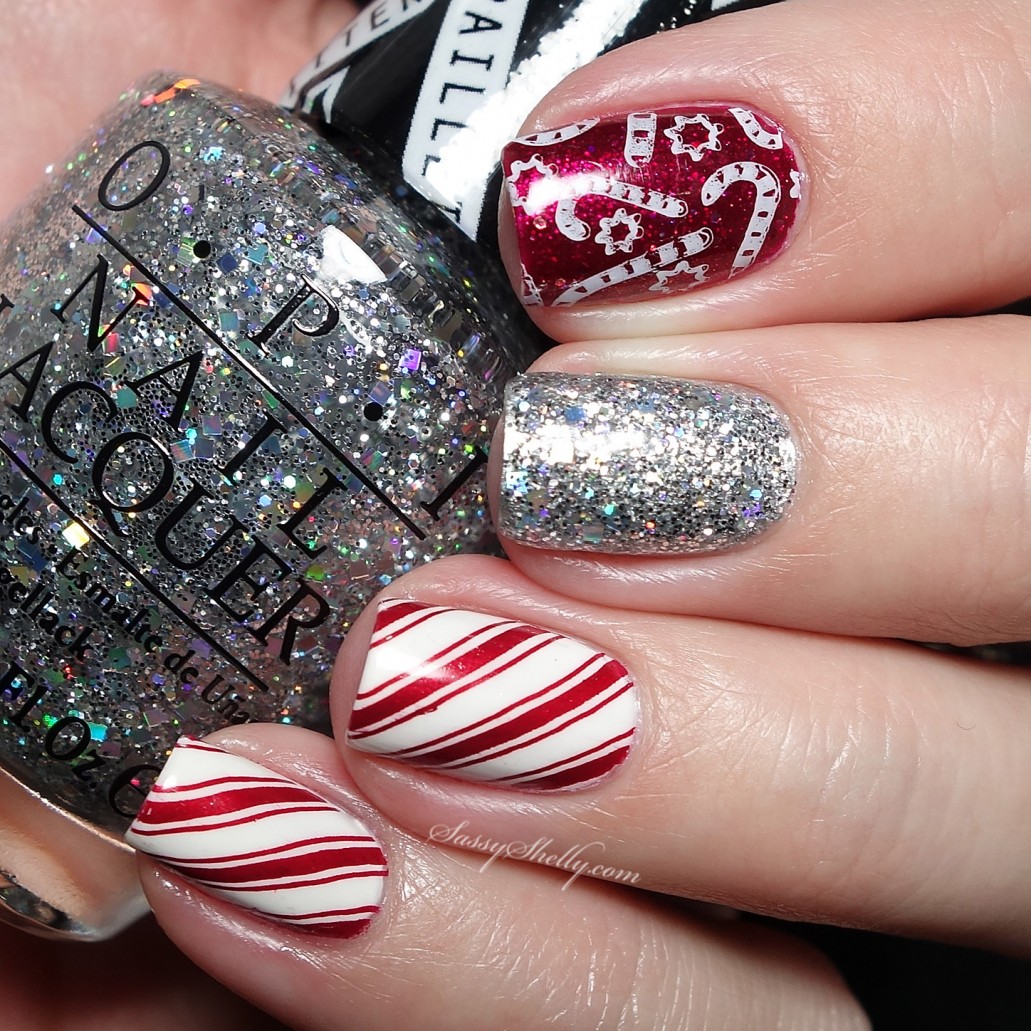
3. Candy Canes:
Candy canes are a delightful Christmas treat that can also be a charming nail art design.
- Classic Candy Cane: Apply a base coat of red polish. Then, using a thin nail art brush dipped in white polish, draw a diagonal stripe from the top corner of the nail to the bottom corner.
- Candy Cane Swirls: Apply a base coat of red polish. Then, using a thin nail art brush dipped in white polish, create swirling lines from the base of the nail to the tip, resembling the candy cane’s spiraled shape.
4. Reindeer:
Reindeer are a beloved Christmas icon and can be incorporated into your nail art in a whimsical way.
- Simple Reindeer: Apply a base coat of your preferred color. Using a thin nail art brush and a contrasting color, draw two small dots for the reindeer’s eyes and a small curved line for its nose. Then, add two small antlers using thin lines.
- Reindeer Silhouette: Apply a base coat of red or green polish. Using a thin nail art brush dipped in white polish, outline a simple reindeer silhouette on one nail.
5. Holly:
Holly leaves and berries are a festive symbol of the Christmas season.
- Holly Sprig: Apply a base coat of green polish. Using a thin nail art brush dipped in red polish, create small circles to represent the holly berries. Then, use a thin nail art brush dipped in green polish to draw a few holly leaves around the berries.
- Negative Space Holly: Apply a base coat of red polish. Then, using a thin nail art brush dipped in green polish, outline a few holly leaves on a single nail. After the green polish dries, carefully remove the outline using a small piece of tape. The remaining negative space will create a subtle yet elegant holly design.
Creative Christmas Nail Art Designs:
1. Christmas Lights:
Christmas lights are a symbol of festivity and can be easily recreated on your nails.
- Multi-Colored Lights: Apply a base coat of your preferred color. Then, using a thin nail art brush dipped in various colors, create small dots or circles to represent the Christmas lights. Arrange them in a cluster or a line to create a dynamic effect.
- Twinkle Lights: Apply a base coat of dark blue or black polish to represent the night sky. Then, using a thin nail art brush dipped in white or gold polish, create small dots or circles to represent the twinkling lights.
2. Gingerbread Man:
Gingerbread men are a delicious Christmas treat that can also be a fun and whimsical nail art design.
- Simple Gingerbread Man: Apply a base coat of brown polish. Using a thin nail art brush dipped in white polish, draw a simple gingerbread man shape on one nail. Then, add details like eyes, a smile, and buttons using a thin brush or a dotting tool.
- Gingerbread Man with Icing: Apply a base coat of brown polish. Then, using a thin nail art brush dipped in white polish, create swirls and lines around the gingerbread man to represent icing.
3. Santa Claus:
Santa Claus is a beloved Christmas icon and can be incorporated into your nail art in a playful way.
- Santa Hat: Apply a base coat of red polish. Using a thin nail art brush dipped in white polish, draw a curved line at the top of the nail to represent the Santa hat’s brim. Then, add a fluffy white pompom at the tip of the hat.
- Santa Face: Apply a base coat of white or beige polish. Then, using a thin nail art brush dipped in black polish, draw two small dots for Santa’s eyes, a small curved line for his nose, and a thick curved line for his beard.
4. Bells:
Bells are a traditional Christmas symbol and can be easily recreated on your nails.
- Simple Bells: Apply a base coat of gold or silver polish. Using a thin nail art brush dipped in a contrasting color, draw a bell shape on one nail. Then, add a small loop at the top of the bell for the clapper.
- Bells with Ribbons: Apply a base coat of gold or silver polish. Then, using a thin nail art brush dipped in red or green polish, draw a thin line across the bell to represent the ribbon.
5. Winter Wonderland:
A winter wonderland theme can be incorporated into your nail art with various elements.
- Snow-Covered Landscape: Apply a base coat of blue polish to represent the sky. Then, using a thin nail art brush dipped in white polish, create small dots or circles to represent snowflakes falling from the sky. Use a small brush dipped in green polish to paint small Christmas trees on the bottom of the nail.
- Snowy Mountains: Apply a base coat of white polish. Then, using a thin nail art brush dipped in gray polish, paint small triangular shapes to represent snowy mountains.
Tips for Easy Christmas Nail Art:
- Use a Base Coat: Always apply a base coat to protect your natural nails and prevent the polish from staining them.
- Choose High-Quality Nail Polish: High-quality nail polish will ensure a smooth and even application, making it easier to create clean lines and intricate details.
- Use a Thin Nail Art Brush: A thin nail art brush is essential for creating precise lines and delicate details.
- Practice on a Practice Nail: If you are new to nail art, practice your designs on a fake nail or a piece of paper before attempting them on your real nails.
- Use a Dotting Tool: A dotting tool is a helpful tool for creating small dots and circles for designs like snowflakes, Christmas lights, and ornaments.
- Use a Top Coat: Apply a top coat to seal in the design and add a glossy finish.
- Don’t Be Afraid to Experiment: Have fun with your designs and don’t be afraid to experiment with different colors, patterns, and techniques.
FAQs about Easy Christmas Nail Art:
Q: What kind of nail polish is best for nail art?
A: Acrylic nail polish is generally preferred for nail art due to its quick drying time and vibrant colors. However, gel polish is also a good option as it offers a long-lasting and chip-resistant finish.
Q: How do I clean up any mistakes?
A: Use a small brush dipped in nail polish remover to carefully remove any mistakes. Be sure to clean up any excess polish around the edges of your nails for a polished look.
Q: How do I make my nail art last longer?
A: Apply a top coat every few days to seal in the design and prevent chipping. You can also use a base coat and a top coat specifically designed for gel polish for longer-lasting results.
Q: What if I don’t have a lot of nail art supplies?
A: Many easy Christmas nail art designs can be created using basic supplies like a thin nail art brush, a dotting tool, and a few colors of nail polish. You can also use household items like toothpicks or bobby pins to create unique designs.
Conclusion:
Easy Christmas nail art offers a fun and festive way to express your holiday spirit. With a little creativity and practice, you can create stunning designs that will complement any holiday outfit. From classic snowflakes to whimsical reindeer, there are endless possibilities to explore. So, embrace the festive season and let your nails shine with cheerful Christmas designs.


Closure
Thus, we hope this article has provided valuable insights into A Guide to Easy Christmas Nail Art: Festive Designs for Every Skill Level. We hope you find this article informative and beneficial. See you in our next article!